The little head next to my name at the top of this page follows your pointer. Click it and it reacts: a blink, a heart, a grin, and if you click it four times fast, dizzy spiral eyes. Elsewhere on the site the same character points at my resume, throws a paper plane at the newsletter form and sits reading on the bookshelf page.
I didn't draw any of it. The art came out of two ChatGPT conversations, and the rest is a short Python script to clean the images and about 150 lines of plain JavaScript. This is the whole process, with the prompts written as templates you can fill in for yourself.
What you need
- One photo of yourself. Facing the camera, even light, nothing over your face. If you wear glasses, wear them.
- An image model that takes a reference image. I used ChatGPT. The prompts are plain text and should carry over to Gemini or similar, but ChatGPT is the only one I ran them through.
- Python 3 with Pillow (
pip install pillow) to remove the background and cut the sheets apart. - A site you can edit. The code here is plain HTML, CSS and JavaScript with no build step.
One thing to decide before you start: you are uploading a photo of your face to the image service. Check its data settings first, and skip the photo route entirely if you would rather describe yourself in words.
The order of work:
- A sheet of nine head directions.
- A matching sheet of nine expressions.
- Remove the green background and check the result.
- Wire the head to the pointer.
- A full-body version of the character.
- A sheet of poses, chosen for the places they will go.
- Place the poses on the page.
Write down what makes you look like you
The model is going to restyle everything about the photo, which is what you want. What survives the restyle is mostly what you name in the prompt. So before writing any prompt, write one sentence that covers:
- hair: shape, length, colour, what the sides do
- facial hair, if any, and where it is fuller or shorter
- glasses: shape, and whether they have a frame
- skin tone
- the top you want the character to wear, with its colour
Mine, from the actual prompt:
They are a young South Indian man with warm wheatish light-brown skin; thick, voluminous jet-black hair swept up and back into a tall rounded quiff with short neat tapered sides above the ears; thick bold straight black eyebrows; RIMLESS rectangular glasses (clear lenses with no frame around them, only a thin dark bridge and thin dark temple arms); a neatly groomed black beard, a full moustache and a fuller, darker chin beard, with the cheeks trimmed short; a gentle closed-mouth smile; and a dark charcoal-grey collared button-up shirt.Notice the glasses. "Rimless" alone is one easily skipped word, so the prompt says it in capitals and then spells out what it means. Do the same for whichever detail is most "you": say it, then describe it.
You will paste this sentence into four prompts. Keep it in a file.
Ask for a sheet, not a portrait
Every request to an image model is a fresh draw. Ask for nine separate pictures and you get nine slightly different styles. Ask for one image that contains nine drawings and the style is decided once.
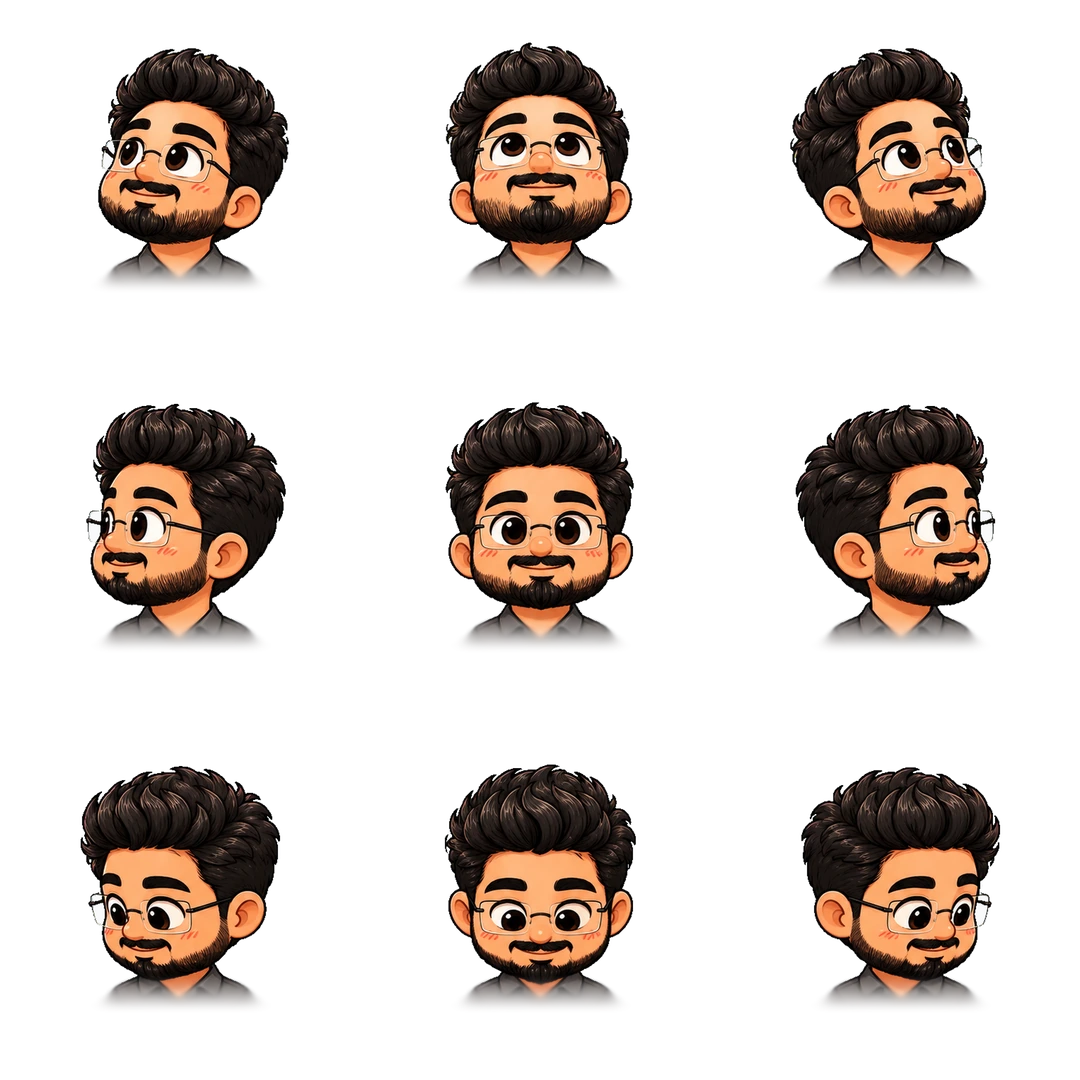
The pointer-following head needs nine views: the eight compass directions plus one looking straight at you. In a 3×3 grid they fall naturally into place:
up-left     up       up-right
left        centre   right
down-left   down     down-right
Open a new chat, attach your photo and send this, with your description pasted in where marked:
The attached image shows a person. Redraw them as a 3x3 grid sprite sheet of NINE HEAD DIRECTIONS, in a completely different style from the attached image. I will ask for a second matching sheet of the same character afterwards.

DO NOT reproduce the photograph: not its realism, not its lighting, not its proportions, not its level of detail. Restyle it completely into a BIG HEAD CHIBI CARTOON: a head roughly one and a half times the width of the shoulders, very large round friendly eyes, a simplified nose and mouth, thick clean outlines and soft cheek blush. Think children's sticker, not portrait.

Keep ONLY the things that identify them: hair shape and colour, facial hair, the shape and colour of any glasses, skin tone, and the colour of their top. [PASTE YOUR DESCRIPTION HERE]. Simplify everything else away.

Cute storybook sticker art: clean bold black outlines with some weight variation, big expressive eyes each with a bright white catchlight, soft pink cheek blush, and warm saturated colours, with several tones per colour. Not flat, not minimal. No photorealism, no heavy 3D gloss, no airbrushed gradients.

LAYOUT: 3 columns by 3 rows, evenly spaced. Each drawing is head plus upper shoulders, centred in its cell, same character and same head size in all nine cells.

FRAMING: a portrait bust. Head, neck and shoulders only. No arms, no hands. The shoulders are about two thirds the width of the head.

THE RULE THAT MATTERS MOST: draw the BODY ONCE and reuse it. The neck, collar and shoulders must be the exact same shape in the exact same position in all nine cells. The body always faces the viewer. Only the head rotates.

MARGINS: each character must sit ENTIRELY INSIDE its own cell with a wide empty gap on all four sides. Draw it at roughly 75% of the cell height. The shoulders must stop well short of the bottom edge of the cell. Nothing may touch or cross a cell boundary.

Turn the whole head clearly, do not just move the eyes: looking left swings the nose left and brings the far ear and cheek into view. The expression stays the same calm friendly one in every cell.
Row 1: up-left, up, up-right. Row 2: left, straight at the viewer, right.
Row 3: down-left, down, down-right.

No floating symbols, no text, no labels, no borders, no drop shadows. The background is one flat uniform pure bright green (#00FF00) covering the entire canvas edge to edge, with no gradient, texture, pattern or checkerboard. Square image, at least 1024x1024.
Each block in that prompt is there because of a specific way these sheets go wrong:
- "Do not reproduce the photograph." With a photo attached, the easy result for the model is your photo with a filter on it. This line pushes it all the way to a cartoon.
- "Draw the body once." On the page, the head swaps cells as your pointer moves. If the shoulders sit a few pixels differently in each cell, the whole character jumps instead of turning its head.
- The margins block. The usual failure is a character whose shoulders or hair run into the next cell. Once that happens no crop can separate them, so the prompt asks for the size and the gap in plain numbers.
- Flat green, never "transparent". When an image tool can't produce a real transparent background, it tends to paint the grey-and-white checkerboard you see in editors straight into the pixels. That checkerboard runs under the edges of the drawing and you can't remove it cleanly. Pure
#00FF00almost never appears in a person, so a few lines of code can take it out.
The expressions sheet, in the same chat
Stay in the same conversation, attach the sheet you just got, and ask for a matching one. The attachment matters more than the words: the model is matching pixels it can see instead of a description it half remembers.
The attached image is a 3x3 head-direction sprite sheet. Produce the MATCHING EXPRESSIONS sheet for that same character: [PASTE YOUR DESCRIPTION HERE]. Copy the character from the attached image exactly: the same colours, hair, glasses, line weight. Do not restyle, simplify or redraw it.

NOT head directions. The character faces STRAIGHT AT THE VIEWER in all nine cells. The only thing that changes between cells is the FACE, plus one small floating symbol in three of them.

CRITICAL: exactly the same size and position in the cell as the attached sheet. The collar and shoulders must be the same drawing, the same width and the same height off the bottom of the cell. If the two sheets do not line up, the character visibly jumps.

Wide margin on all four sides, nothing touching a cell edge, including the floating symbols.

The nine expressions, left to right, top to bottom:
1. Eyes closed as two upward curved arcs. No symbol.
2. Same closed arc eyes, plus one small red heart floating above the head.
3. Same closed arc eyes, plus three small yellow sparkle stars above the head.
4. Eyes wide open and very round, mouth in a small round O of surprise.
5. Starstruck: both eyes drawn as bright star shapes, big happy smile.
6. Eyes closed arcs, strong pink blush on both cheeks.
7. Eyes closed sleeping curves, plus a small blue "z z z" above the head.
8. Both eyes drawn as spiral swirls, wavy wobbly mouth. Dizzy.
9. Eyes closed arcs, mouth wide open in a big happy grin.

No text, no labels, no borders, no drop shadows. One flat uniform pure bright green (#00FF00) background, edge to edge. Square image, at least 1024x1024.
The order of those nine is the order the code expects. If you change an expression, keep its position or update the list in the script.
Check it before you keep it
Look at both sheets properly before writing any code. Four checks:
- Likeness. Does it read as you to someone who knows you? If not, the fix is usually a more specific description, not another attempt with the same one.
- Background. Zoom into the corners and the gaps between cells. It should be one flat green, with no checkerboard and no gradient.
- Margins. Nothing touches a cell edge, including hearts and sparkles.
- Alignment. Open both sheets as layers in any image editor, set the top one to 50% opacity, and look at the shoulders. They should overlap almost exactly.
When the background or the likeness is wrong, start a new chat and send both messages again. Arguing with a broken result in the same chat tends to keep its problems. When a single cell is wrong and everything else is good, stay in the chat and ask for that cell only: "Keep cells 1 to 8 exactly as they are and redraw only cell 9: …".
Remove the green
For each pixel, measure how much greener it is than it is red or blue: G - max(R, B). The background scores around 255. Skin, hair and a grey shirt score close to zero. Anything in between is the soft antialiased edge, and it gets partial transparency.
from PIL import Image, ImageChops

LOW, HIGH = 40, 110   # below LOW: keep. above HIGH: remove. between: soft edge

def key(rgb):
    r, g, b = rgb.split()
    others = ImageChops.lighter(r, b)        # max(R, B) per pixel
    spill = ImageChops.subtract(g, others)   # how much greener than anything else
    span = HIGH - LOW
    alpha = spill.point(lambda v: 255 if v <= LOW else 0 if v >= HIGH
                        else round(255 * (HIGH - v) / span))
    g = ImageChops.darker(g, others)         # pull green out of the edge pixels
    return Image.merge('RGBA', (r, g, b, alpha))

sheet = key(Image.open('directions.png').convert('RGB'))
sheet.save('directions.webp', quality=88)
The line with darker matters more than it looks. Without it, the edge pixels keep a green tint and the character gets a faint green halo on a light page. Capping green at the larger of red and blue removes the tint without touching the drawing.
Check the result by placing it on both your light and dark page backgrounds. A halo you can't see on white is often obvious on charcoal.
The head sheets stay whole, since the browser picks cells out of them. Later on, the pose sheet gets cut into separate images: split it into its four cells, then trim each to its drawing plus a few pixels of padding. Measure the trim on a version of the alpha mask with speckles removed. Otherwise one stray unkeyed pixel in a corner stretches the crop to the full cell.
Make the head follow the pointer
The head is a button with two stacked layers. One shows the direction sheet and the other the expressions sheet. Each layer uses the whole sheet as its background at three times the button's size, so exactly one cell fits in the button at a time. Choosing a cell is then a matter of background position, and on a 3×3 grid every position is 0%, 50% or 100% on each axis:
// cell 0..8, row-major: 0 is up-left, 4 is centre, 8 is down-right
function position(index) {
  return (index % 3) * 50 + '% ' + Math.floor(index / 3) * 50 + '%';
}

layer.style.backgroundImage = 'url("sandeep-directions.webp")';
layer.style.backgroundSize = '300% 300%';
layer.style.backgroundPosition = position(4);   // look at the reader
To choose the direction, take the angle from the centre of the button to the pointer and split the circle into eight 45° slices:
var CLOCKWISE = ['right', 'down-right', 'down', 'down-left',
                 'left', 'up-left', 'up', 'up-right'];
var SECTOR = (Math.PI * 2) / 8;
var DEAD_ZONE = 70;      // px: closer than this, look straight ahead
var HYSTERESIS = 0.12;   // radians of extra slack before changing slice

function aim(pointer) {
  var box = button.getBoundingClientRect();
  var dx = pointer.x - (box.left + box.width / 2);
  var dy = pointer.y - (box.top + box.height / 2);
  if (Math.hypot(dx, dy) < DEAD_ZONE) return show('center');

  var angle = Math.atan2(dy, dx);   // y points down, so this runs clockwise
  // stay in the current slice until the pointer is clearly past its edge
  if (sector !== -1 &&
      Math.abs(wrap(angle - sector * SECTOR)) < SECTOR / 2 + HYSTERESIS) return;
  sector = (Math.round(angle / SECTOR) + 8) % 8;
  show(CLOCKWISE[sector]);
}
The two constants at the top are there for comfort, not correctness. Without the dead zone, a pointer resting on the face makes the head twitch between all eight directions. Without the hysteresis, a pointer sitting right on a slice boundary flips the head back and forth.
Clicks use the expressions sheet. Hide the direction layer, show the expression layer at the right cell, and put things back after half a second. My version blinks first and then shows a heart, sparkles or a grin in turn. Four quick clicks get the dizzy face. A small squash-and-stretch animation on the button sells the "boop".
Three details that are easy to skip:
- Only track on devices with a real pointer. Check
matchMedia('(hover: hover) and (pointer: fine)'). On a phone there is no pointer to follow, so the head faces forward and still reacts to taps. - Respect reduced motion. Skip the squash animation when
prefers-reduced-motion: reducematches. - Load both sheets up front. Create the expression layer at mount time, even though it is hidden. If it loads on first click, that first click shows nothing.
The markup is a plain button with a still image inside, which acts as the fallback when JavaScript doesn't run:
<button type="button" data-mascot
        data-directions="sandeep-directions.webp"
        data-reactions="sandeep-reactions.webp"
        data-size="140" aria-label="Boop cartoon Sandeep">
  <img src="sandeep-logo.webp" alt="" width="128" height="128">
</button>
My script is a plain JavaScript port of the <Mascot /> React component from Kamran Ahmed's MIT-licensed page-mascot project, which is where this whole idea comes from. If your site is React, use the original.
Give the character a body
The head is enough for a logo. The fun starts when the character can do things next to your content, and for that it needs arms, hands and legs.
Do this in two steps in one new chat. First, a single full-body drawing, so the body is decided once. Then the poses, drawn from that body. Attach your expressions sheet (it shows the face most clearly) and send:
The attached image is a sprite sheet of a chibi cartoon character, shown as head and shoulders only. Draw that SAME character as a FULL-BODY character: head, torso, both arms with hands, both legs and feet. One single drawing, standing, facing the viewer.

Copy him exactly from the attached sheet: [PASTE YOUR DESCRIPTION HERE], the same thick clean outlines and the same cute storybook sticker style. Do not restyle, simplify or redraw the face.

BODY: a cute big-head chibi. The head stays big, about 40% of the total height. Below it a small, slightly rounded body:
- [YOUR TOP, e.g. the same dark grey collared shirt, sleeves rolled up];
- short arms with simple rounded cartoon hands, four fingers and a thumb;
- [YOUR TROUSERS];
- [YOUR SHOES];
- arms relaxed at the sides, feet slightly apart, a calm friendly smile.

FRAMING: the whole character from the top of the hair to the soles of the shoes, centred, about 80% of the image height, with a wide empty margin on all four sides.

No text, no ground shadow, no scenery. One flat uniform pure bright green (#00FF00) background, edge to edge. Nothing in the drawing may be bright green. Square image, at least 1024x1024.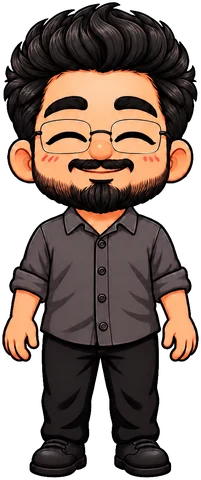
The "about 40% of the total height" line is what keeps it the same character. Without a proportion in the prompt, nothing tells the model to keep the big head that matches your header.
Choose poses for where they will go
Don't ask for "four fun poses". Decide where each one goes on your site first, because the place decides the pose, and especially which way it faces.
These are mine:
| Pose | Where | Why it faces that way |
|---|---|---|
| Pointing right | Left of the Resume button | The button is to his right |
| Throwing a paper plane left | Right side of the email signup card | The form is to his left |
| Reading a book, sitting | Beside the Bookshelf heading | Faces the reader; sitting keeps it short and wide |
| Holding a rocket with an envelope | Corner of the newsletter card | Sits on the card's top edge, so it faces the reader |
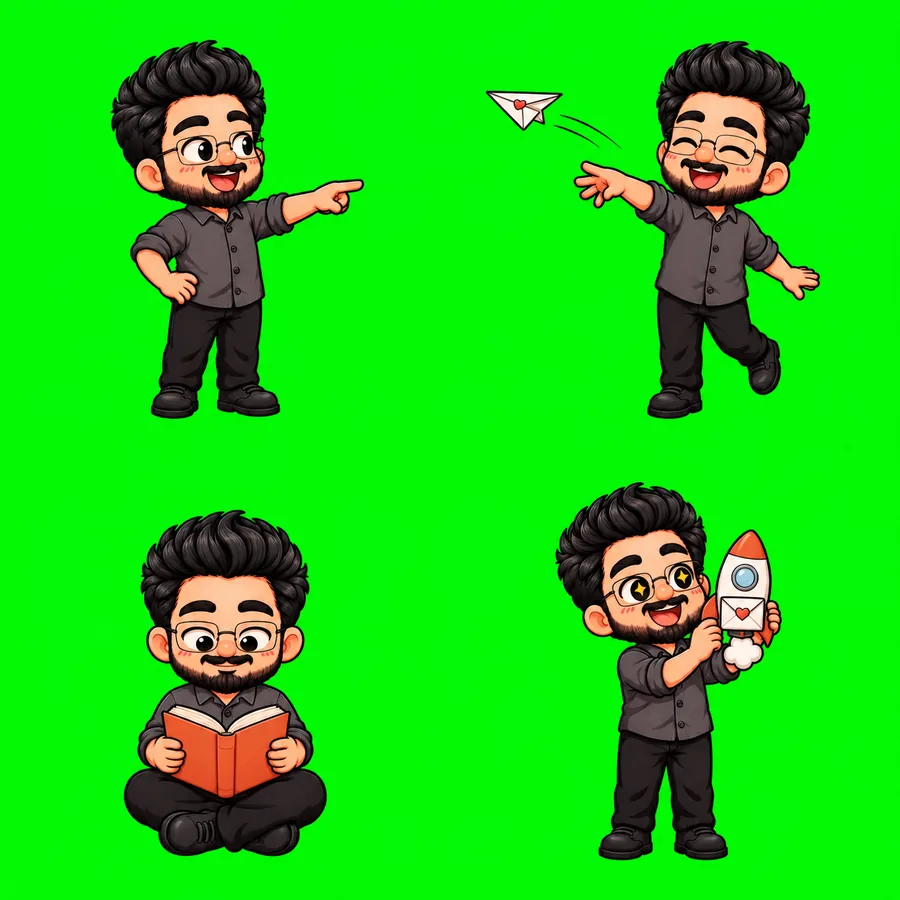
Full bodies need more room than heads, so this sheet is 2×2. In the same chat as the full-body drawing, send:
Now draw this exact full-body character from your previous image in four new poses, as a 2x2 grid sprite sheet. Same face, hair, glasses, clothes, body proportions, line weight and colours. Do not restyle or simplify him.

LAYOUT: 2 columns by 2 rows, four equal square cells, the character the SAME SIZE in all four.

MARGINS: each character and everything he holds must sit ENTIRELY INSIDE its own cell, with a wide empty gap on all four sides, at roughly 75% of the cell height. Nothing may touch or cross a cell boundary: not a hand, not a foot, not a prop, not a motion line.

The four poses, left to right, top to bottom:
1. [POSE, the direction it faces, what the hands do, the expression]
2. [...]
3. [...]
4. [...]

No text, no letters, no ground shadows, no scenery. One flat uniform pure bright green (#00FF00) background, edge to edge. Nothing in the drawing may be bright green. Square image, at least 1024x1024.
Write each pose the way you would brief an illustrator: the direction, both hands, any prop with its colour, and the face. For example: "POINTING RIGHT. Body turned three-quarters toward the viewer's RIGHT, one arm stretched straight out with the index finger clearly pointing right, the other hand on his hip. Big cheerful smile, eyes looking where he points." Say "the viewer's right". Plain "right" can mean either side.
Give props a colour from your own palette. The book and rocket in mine are the same terracotta as the accent on this site, which makes them look like they belong.
Put the poses on the page
Run the same keying function, cut the four cells and trim them. Mine came out between 294 and 460 pixels wide and about 500 tall, 24 to 29 KB each as WebP.
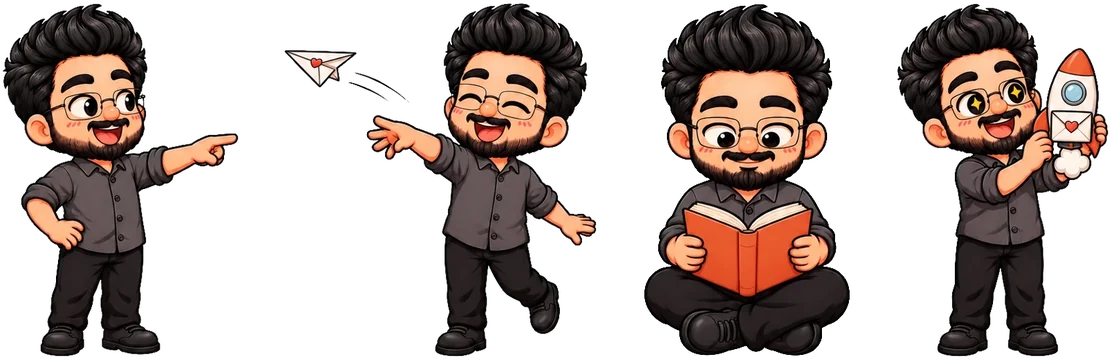
They are decoration, so they get an empty alt and stay out of the way of the content:
<img class="pose pose-point" src="pose-point.webp"
     width="350" height="520" alt="" loading="lazy" decoding="async">
.pose { display: block; width: auto; pointer-events: none; user-select: none; }Set the width and height attributes to the file's real size and size the image in CSS by height only. The browser then knows the shape before the file loads, and the page doesn't shift when it arrives.
Lining up a pointing finger
This one took a measurement. In my pointing pose the fingertip is about 60% of the way up the image. I wanted the mascot beside the button without moving the button, so it is absolutely positioned against the button's wrapper, with its feet allowed to hang below the button until the finger is level with the label:
.pose-cta   { position: relative; display: flex; }
.pose-point { position: absolute; right: calc(100% + 2px);
              bottom: -42px; height: 104px; }
With a height of 104px, the fingertip sits about 62px above the image's bottom edge. Moving the image 42px down puts the fingertip about 20px above the bottom of a 40px button, which is its middle. Measure your own pose the same way; the numbers will be different.
Sitting on the edge of a card
For the newsletter card I wanted the character standing on the card's top edge. A right float with a negative top margin does it, and the card's heading wraps around him instead of running underneath:
.pose-rocket { float: right; height: 140px; margin: -76px -8px 0 8px; }
.newsletter-card .sm-signup { clear: both; }
A little movement
A slow 5px drift makes the poses feel alive without pulling attention away from the text. It only runs for people who haven't asked for reduced motion:
@media (prefers-reduced-motion: no-preference) {
  .pose-point { animation: pose-nudge 1.8s ease-in-out infinite; }
  .pose-plane { animation: pose-float 3.4s ease-in-out infinite; }
}
@keyframes pose-nudge { 50% { translate: 5px 0; } }
@keyframes pose-float { 50% { translate: 0 -5px; } }
The pointing pose nudges sideways, toward the button. The others float up and down.
Check it at phone width and in dark mode
Both caught something on my site. At 375px wide, the paper-plane pose covered the signup card's heading, so on small screens it moves up to sit on the card's top edge instead. And in dark mode the character's black trousers and shoes nearly disappear into the background. The outlines still hold the shape, so I left it, but if your character wears dark clothes, check before you commit to them.
How many is too many
I keep it to one pose on screen at a time, plus the head in the header. The character works because it turns up now and then, in a place where it has a reason to be. Pointing at the button you want people to press is a reason. Filling empty space is not.
When you want more poses later, open a new chat, attach the full-body drawing and your existing pose sheet, and ask for four new poses "at the same size in the cell as the attached 2x2 sheet". Two references keep a second batch close to the first.
Start with the head
The head sheet is the part that decides everything else. Write your description, send the first prompt, and keep going until you have a sheet that looks like you with a clean green background. Everything after that is follow-up prompts and code you can copy from this page.